1. Performance Reviews – Managers/Supervisors must complete an annual Performance Review for their team members.
2. Vehicle Maintenance – An Ambulance Operator must complete a form/checklist about the Ambulance they are operating at the beginning of each shift.
3. Payroll Changes – A Manager will submit a Payroll Change Request to HR for various reasons for employees. A Payroll Change for any employee requires authorization by the Vice President before it can be processed by HR. The Manager, VP, and HR can manage and access multiple Payroll Change Requests for different employees at the same time.
Example 1: Performance Review (Form is about someone else)
A Manager needs to complete Annual Performance Assessments for all their team members. In this example, the Manager will complete an Assessment for each employee and each employee will review their own Performance Assessment done by their manager, the employee will provide final signoff to complete the Performance Assessment form.
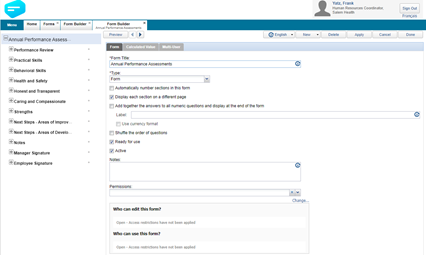
Form builder
Create an Annual Performance Assessment within the Form Builder.
In this example there are 11 sections the Manager will fill out about their employee, starting with the first section called ‘Performance Review’ and ending with the section called ‘Manager Signature’. The last section, called ‘Employee Signature’ will be assigned to the employee to provide their signature and signoff on the performance review.
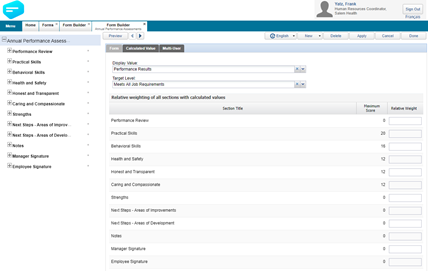
Calculated Values
Within the Calculated Values tab, set the Display Values, Target Levels and Relative Weight for each section in the form.
- Display Value provides the ability to use a Likert Scale when displaying the overall result of a completed form. For example, Meets Expectations, Below Expectations, etc.)
- Target Level provides the ability to select one of the Display Values that your organization wants as the minimum target to be met on a completed form. For example, when an Annual Performance Assessment form is completed, the overall result of the form should result in a minimum ‘Meets Expectations’ – otherwise the target has not been met.
- Relative Weight provides the ability to give more or less weight (value) to a section of a form. For example, the section ‘Practical Skills’ could be given a higher weight than the other sections in the form.
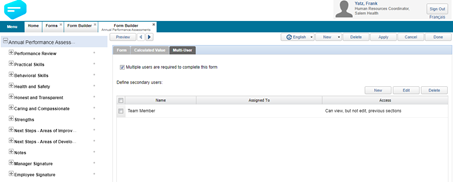
Multi-User
Within the Multi-User tab, select Multiple users are required to complete this form. Define all the secondary users who will be involved in the completion of the form, a Secondary User is anyone who will be involved in completing subsequent sections of the form.
In this example, we only have one secondary user who is the Employee the Performance Review is about. We are calling this secondary user ‘Team Member’.
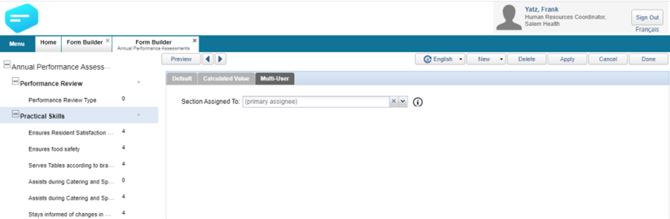
Once you have the Secondary User defined, navigate to each section in the form and on the Multi-User tab, ensure the section is assigned to the appropriate user.
In this example, all sections except the last section will be assigned to the Manager of the Employee the form is about, who is also the primary assignee of the form.
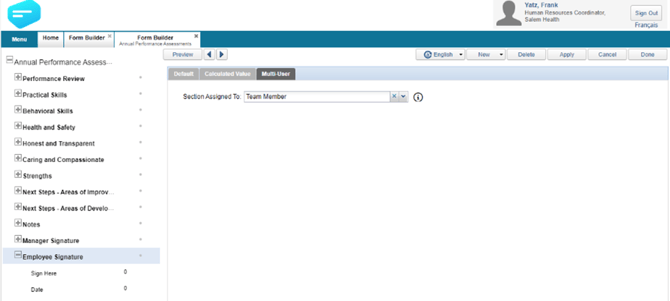
Note: when assigning the Secondary Users, you must start at the last section of the form and work your way up.
In this example, the last section is assigned to the Employee the form is about, which has been defined as the secondary user ‘Team Member’.
Form Menu
Navigate to the Form menu and create a new Form for the Annual Performance Assessment.
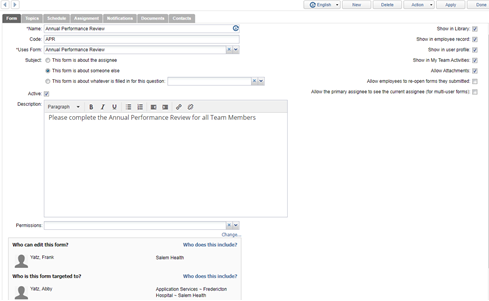
In this example the Annual Performance Assessment form has been assigned a Subject: This form is about someone else.
This is because the Manager will be assigned the form to complete about their employee(s). The Employee themself will be assigned the form only after the manager has completed their sections.
This form is also setup to have the following attributes: Show in Library, Show in employee record, Show in user profile, Show in My Team Activities, and Allow Attachments.
To set up this type of Form to recur on an annual basis, use the This form is reassigned on a custom schedule option. In the Configure… area, choose Daily from the dropdown menu, and set the day(s) field to 365 if you would like the form to be reassigned one year out from the initial assignment.
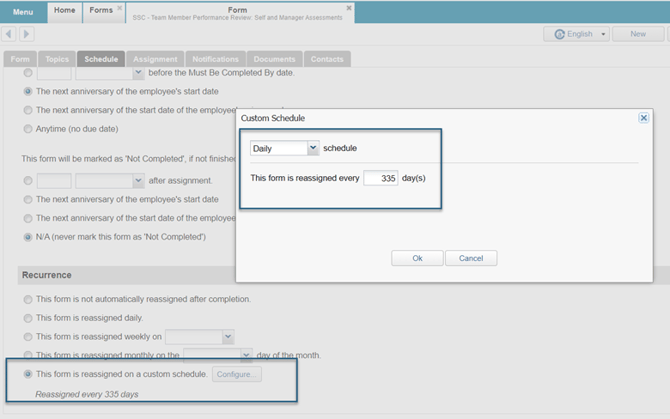
Alternatively, adjust the number of days to 335 if you would like the form to be reassigned a month ahead of the anniversary date, for example.
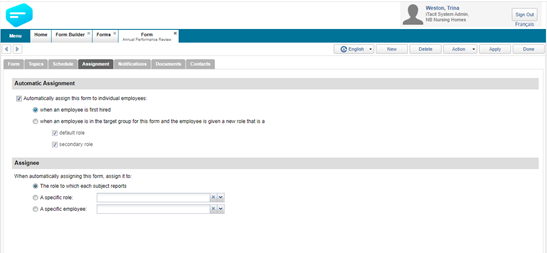
Assignment
The Assignment tab is where you can define whether the form should be automatically assigned and when. It also allows you to define who should be assigned the form.
In this example, we want the Annual Performance Review to be automatically assigned when an employee is first hired. We also want the Manager to be assigned the Performance Review form, so we select the assign it to the role to which each subject reports.
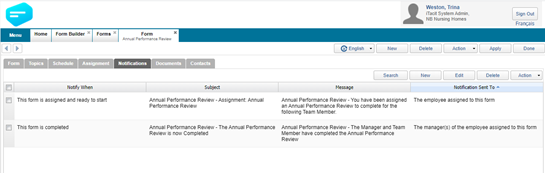
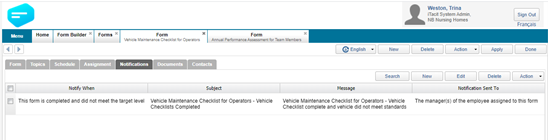
Notifications
The notifications tab is where you can define what types of notifications should be sent for the form and when they should be sent.
In this example, the Manager will be notified that they have been assigned a Performance Review for their employee and the Manager will be notified when the form has been completed.
My Activities (iTacit 2.0)
Managers will see the Annual Performance Review for their employees within the My Activities menu.
Example 2: Vehicle Maintenance Form (Form is about an item)
An Ambulance Operator must complete a form/checklist about the Ambulance they are operating at the beginning of each shift.
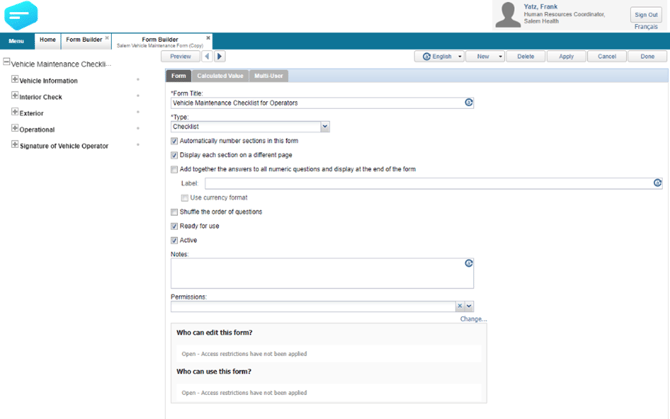
Form Builder
Create a Vehicle Maintenance Checklist within the Form Builder.
In this example the Checklist is not required to be multi-user; this is because the checklist will be completed by the primary assignee only (the Ambulance Operator).
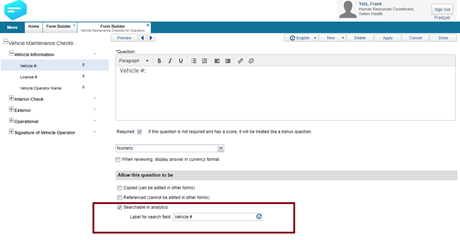
Once the Vehicle Maintenance Checklist is created, we next need to identify which of the items/questions on the form are ‘what this form is about’.
In this example the form is about a Vehicle, so the ‘Vehicle #’ question within the form will be flagged as Searchable in Analytics / Usable as a Form Subject.
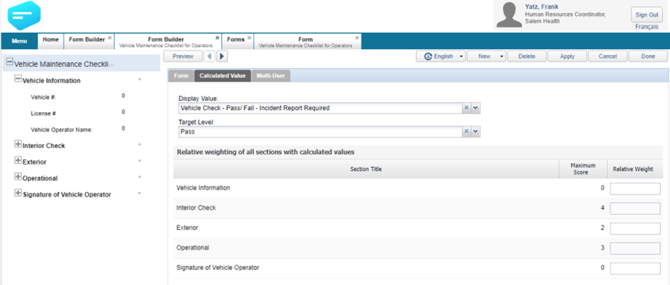
Calculated Values
Within the Calculated Values tab, set the Display Values, Target Levels, and Relative Weight for each section in the form.
In this example, the Display Value is using a Likert scale containing ‘Pass/Fail’, with the target level of Pass.
Multi-User
In this example, the employee filling out the Vehicle Maintenance Checklist is the only person involved in the completion of the form, so the Multi-User section is not used.
Form Menu
Next, create a Form that will use a Form created in the Form Builder called ‘Vehicle Maintenance Checklist’.
The Form is setup with the Subject: This form is about a Form Subject defined in the Form Builder
In this example, the Vehicle # question was selected in the Form Builder as Searchable in Analytics / Usable as a Form Subject, so we will select the ‘Vehicle #’ as the subject of the form. This makes the subject of the form ‘about’ a specific Vehicle #.

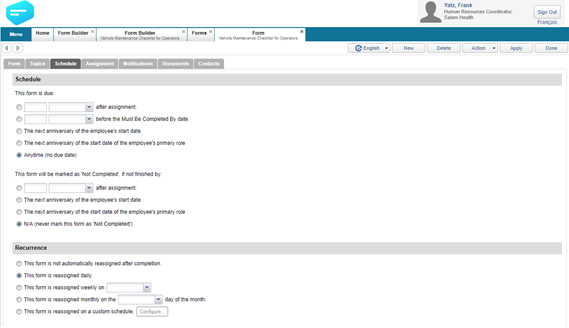
Schedule
The schedule tab is where you can define when a form is due, what should happen when a form isn’t completed by the due date, as well as if a form should recur and the recurrence frequency.
In this example, the Vehicle Checklist doesn’t have a specific due date and is reassigned daily.
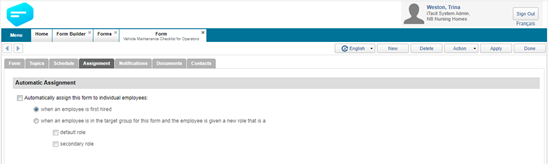
Assignment
The Assignment tab is where you can define if the form should be automatically assigned and when. It also allows you to define who should get assigned the form.
In this example the Vehicle Maintenance Checklist will be targeted to a Role, which will allow anyone in that role to pickup the Checklist at the beginning of each shift. With this example, we do not need auto-assignment turned on.
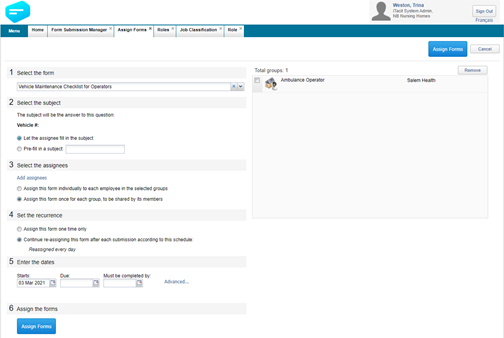
Form Submission Manager
Because the subject of the Vehicle Checklist is the Vehicle #, we will assign the Vehicle Checklist within the Form Submission Manager using the option Assign a form to employees about an item.
First, we will select the Vehicle Checklist as the form, which will automatically show that the subject of the form is the Vehicle #.
Since we don’t know the specific vehicle # the employee may take for each shift, we will select the first option and let the employee enter the Vehicle # each time they start a new Vehicle Checklist form.
We will then select the assignee(s), which is our Ambulance Operator role. Because we want anyone who is an Ambulance Operator to be able to be able to access and complete the Checklist at the start of their shift, we will choose the second option Assign this form once for each group, to be shared by its members.
Now we will set the recurrence based on the schedule we defined in the Form, which is to be reassigned every day.
The last step is to set the appropriate dates. For the Vehicle Checklist we want it to start today, but we don’t need a specific due date or must be completed date, as the Checklist will be reassigned every day.
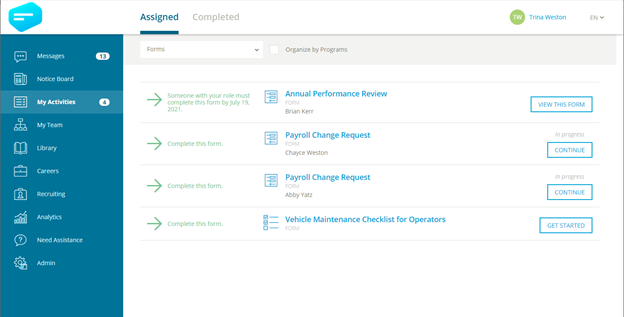
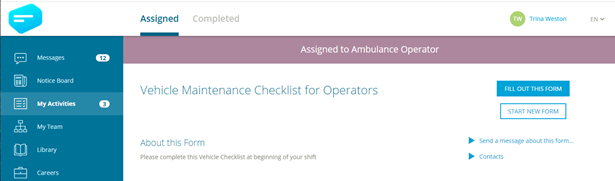
My Activities (iTacit 2.0)
Ambulance Operators can now see Vehicle Maintenance Checklist within the My Activities area. In this example, Trina can see that there is a Vehicle Maintenance Checklist that must be completed by someone with this role. Selecting View this form allows them to fill out the checklist for the ambulance they will be operating that day.
Example 3: Payroll Change Request Form (Form is about someone else)
A Manager needs to submit a Payroll Change Request to HR for various reasons for their employee. A Payroll Change for any employee requires approval by the Vice President before it can be processed by HR. The Manager, VP and HR can manage and access multiple Payroll Change Requests for different employees at the same time.
Form Builder
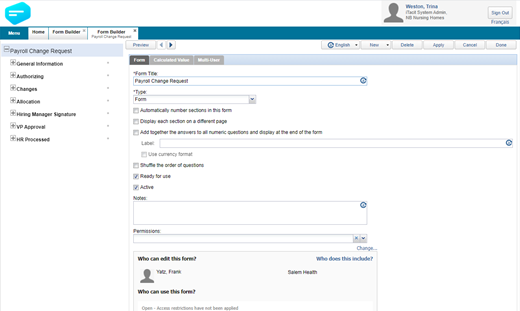
Create a Payroll Change Request form within the Form Builder.
In this example the payroll change will be initiated by the Manager. The VP will then need to provide approval and, finally, someone in HR will process the change. As a result, this form will be a setup as a multi-user form.
Multi-User
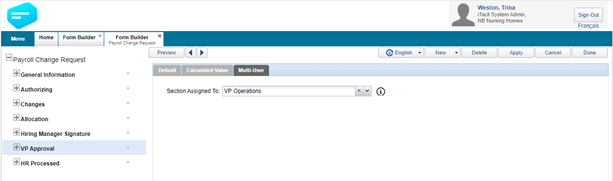
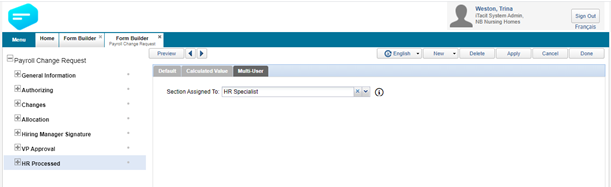
Select the Multiple users are required to complete this form checkbox and define the secondary users. In this example there are two: VP Operations and HR Specialist.
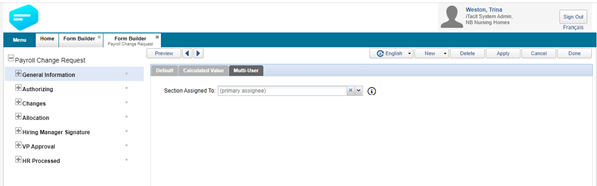
The first 5 sections are assigned to the Primary Assignee who is the Manager in this example.
The last 2 sections of the form are assigned to the VP Operations for approval and HR Specialist for processing.
Forms
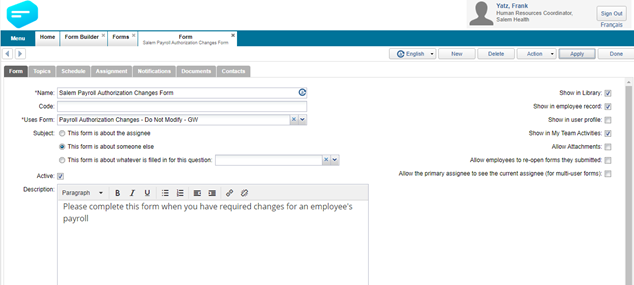
Next, create a Form that will use a Form created in the Form Builder called ‘Payroll Change Request’.
The Form is set up with a Subject: This form is about someone else.
The form is also setup to have the following attributes: Show in the Library, Show in employee record, Show in My Team Activities.
Schedule & Assignment
The Payroll Change Request form will be initiated by the Manager from within the Library on an ‘as needed basis’. It will not be auto-assigned, nor will a due date be automatically assigned. This means this form does not require any setup in the schedule or assignment areas.
Notifications
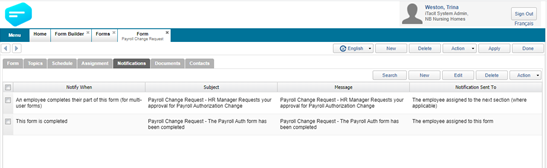
The notifications tab is where you can define what types of notifications should be sent for the form and when they should be sent.
In this example, the VP Operations will be notified they must give their approval on the Payroll Change Request as soon as the Manager has completed their portion of the form. The Manager will also receive a completed notification as soon as the HR Specialist has processed their portion of the form, signifying the form is complete.
Library (iTacit 2.0)
Log on to iTacit and navigate to Library > Forms
Managers can find the Payroll Change Form within the Library when they need to submit a Payroll Change for one of their Employees.
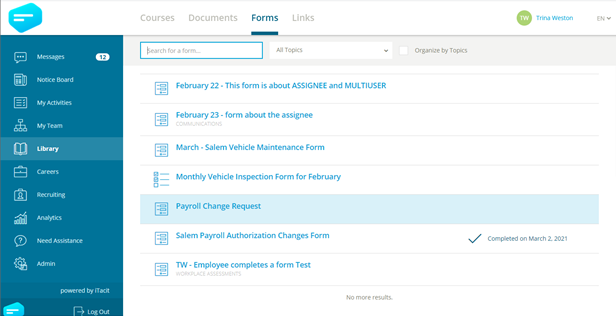
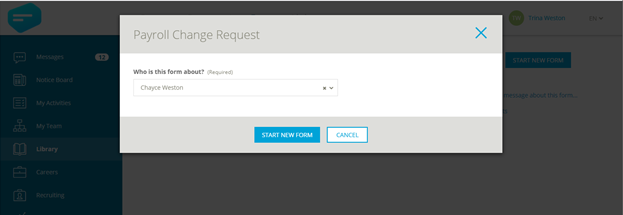
Selecting the row for the desired form will allow the user to choose the START NEW FORM button.
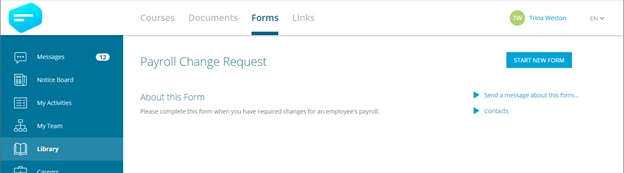
From here, the Subject of the form (i.e. the employee in this case) must be chosen.
Next, the form questions can be filled out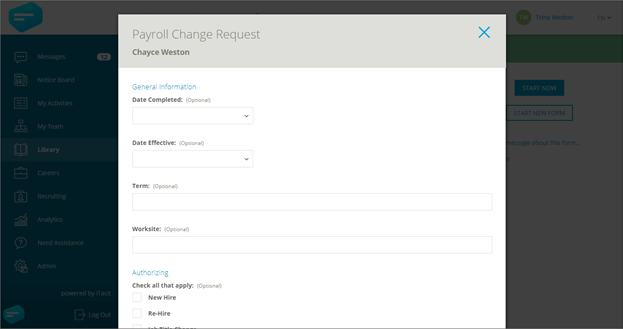

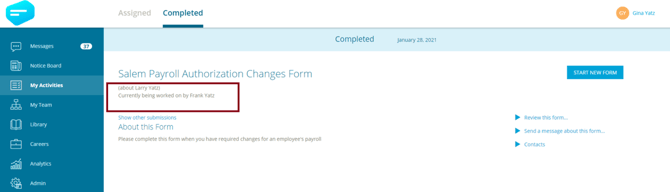
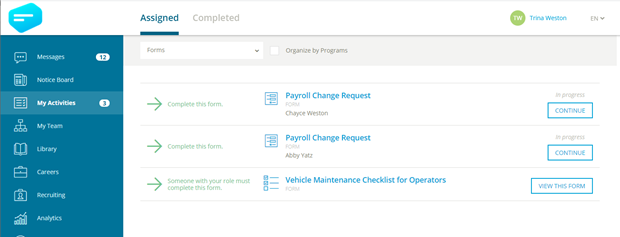
My Activities
Managers can see all the forms assigned to their Employees within the My Activities area. In this example, Trina is working on two Payroll Change Requests, one for Chayce and another for Abby.
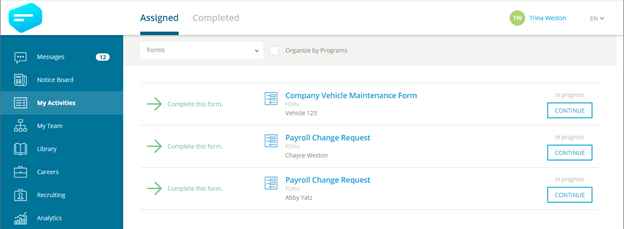
Managers can also view the secondary assignees of a form, allowing them to monitor the workflow of an assigned form. For example: Has the HR co-ordinator given their approval on my request yet? The manager can find out by looking at the Completed area of their My Activities menu.