Removing Hard-Coded Formatting:
To ensure a clean display of iCourse text, complete the steps below to remove hard-coded formatting. The text can then be formatted in the iCourse editor, using the built-in toolbar. Using this option will allow you to be more selective with the changes you make versus removing all formatting using the Clear Formatting tool.
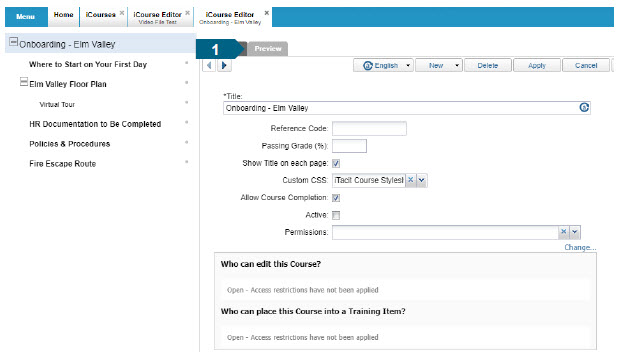
In your Administrative Tools, open the iCourse Editor, and open the iCourse you want to modify.
1. For each iCourse section, use the Preview tab to check fonts to ensure that styles are being used, not hard-coded font names or sizes. If there are hard-coded fonts, move on to step 2. If not, your formatting is likely already in shape to be viewed on mobile.
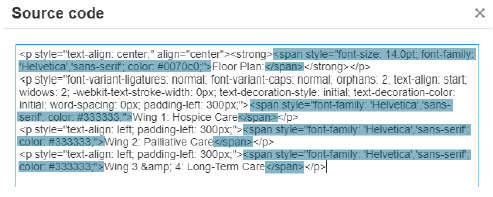
2. View the HTML source in the editor toolbar by clicking the Source code button.

Check for <span> tags (which typically come from Lists), hard-coded font references, or any other problematic HTML (from MS-Word, etc.), and remove.
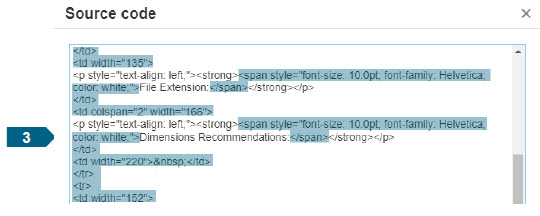
3. If using tables, check the embed code following the same process for hard-coded column widths, and remove.
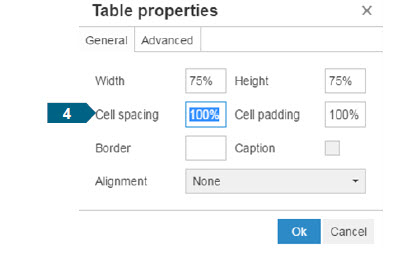
4. Open Table Properties and change dimensions to percentage values instead.
Images and Text:
If you are creating content where images and text are to be placed alongside each other, you will likely need to create cell padding within the code in the Advanced options for your text so that it looks streamlined.
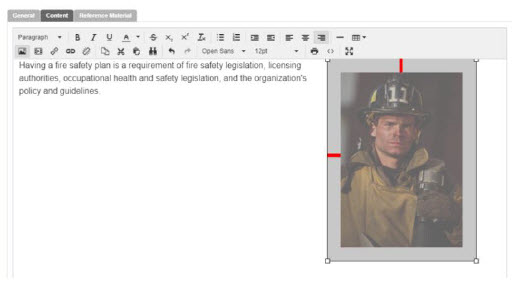
In the screenshot below, you are able to see the effect of padding on an image. The image is highlighted to show the negative space around an image that padding provides, as indicated by the red lines. The padding is not visible otherwise.
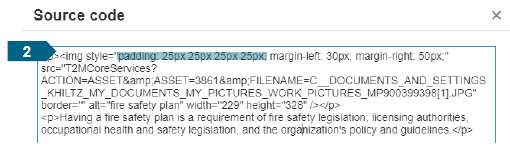
1. To add padding around your image, access the source code.

2. After the <img style> tag, you can specify, in pixels, how much padding you want to add, and on which sides of the image.
Padding is applied in a clock-wise direction. If you only want to add padding to the bottom of the image, for example, you would write:
<img style=“padding: 0px 0px 25px 0px; …etc.>
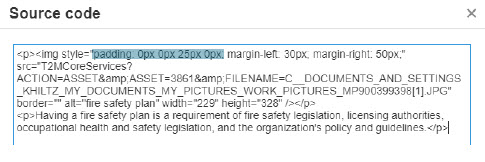
In this example, padding will display like so:
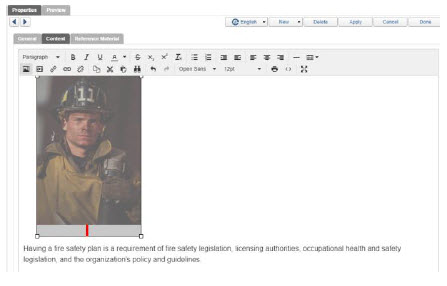
3. To confirm the look of the padding you’ve added, click Preview.