---------------------------------------------------------------------------
Creating a Survey
1. Log in to the iTacit Admin site.
2. Navigate to Menu > Surveys > Surveys. If you do not see the Surveys option, your role may not have the required permissions. Contact your Site Coordinator or System Administrator.
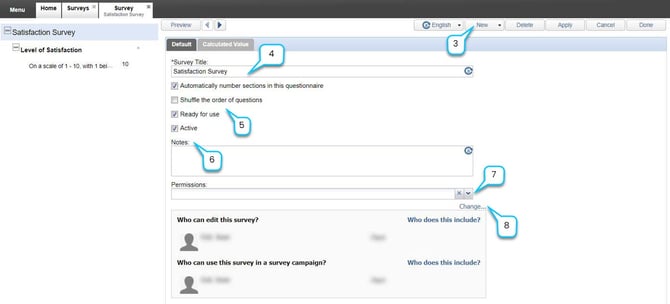
3. Click New to initiate a new Survey Questionnaire.
4. Provide a clear, descriptive name for your survey. This title will be visible in the Survey Campaign setup.
5. Check the box labeled Ready for use to indicate the survey is active and available for campaigns.
6. (Optional) Use the Notes field to document internal details or context about the survey’s purpose.
7. Use a predetermined permission group to define:
-
Who can edit the survey.
-
Who can use the survey in a campaign.
8. If no permission group is available:
-
Click Change... to manually assign permissions.
-
Search for and select:
-
Group
-
Business Unit
-
Job Classification
-
Role
-
Individual Employees
-
-
Click Add to include selections.
-
Use Who does this include? to preview the list of affected users.
-
To remove a selection, highlight and click Remove.
-
Calculated Value Tab:
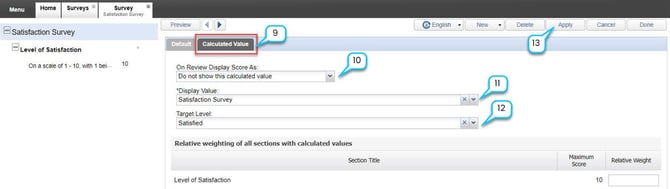
9. Navigate to the Calculated Value tab to define how survey results will be displayed.
10. Choose Display Format. Select one of the following options:
-
Number
-
Percentage
-
Display Value
-
None
11. Click Search to choose from existing Display Values. If none are suitable, refer to the lesson on Creating Display Values.
12. Choose a Target Level based on the scale defined in the selected Display Value.
13. Save your configuration by clicking Apply.
Adding Sections and Questions
Once your Survey Questionnaire is created and configured, the next step is to build its structure by adding Sections and Questions. Sections help organize your survey into thematic areas, while questions collect the actual data from respondents.
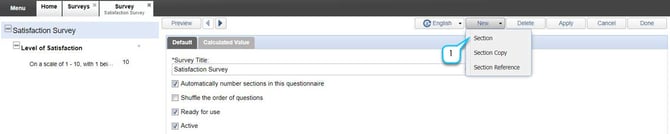
1. In the left-hand table of contents, click the Survey Title to ensure you're at the top level of the survey structure. Choose New, then select Section to begin creating a new section.
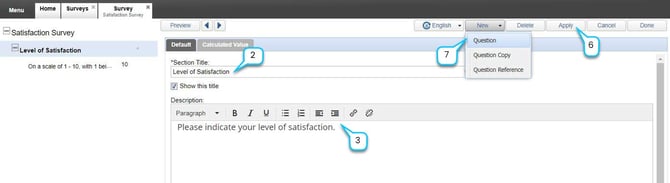
2. Provide a clear and descriptive title for the section.
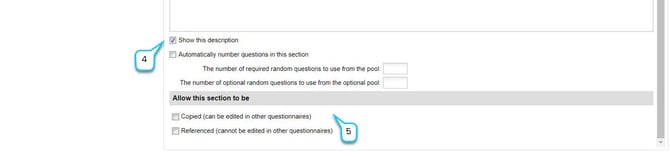
3. Include a brief description to clarify the purpose or content of the section.
4. (Optional) Enable Automatic Question Numbering: Check the box to automatically number questions within this section.
5. In the section Allow this section to be:
-
Select Copied (to make the section available for copy and edit in other surveys).
-
Select Referenced (to make the section available for copy only).
6. Click Apply to save your changes.
7. Once you have saved the Section by clicking apply, you can click New to add a new Question.
Adding Questions to a Section
1. In the left-hand table of contents, click the section where you want to add questions. Choose New, then select Question.
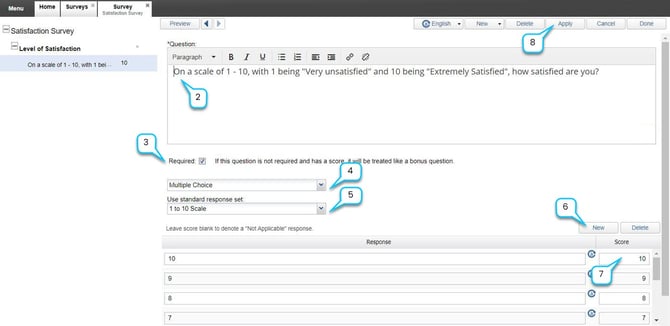
2. Type the question you want to ask.
3. By default, questions are required. Uncheck the box if the question should be optional.
4. Choose Question Type. Select from the following types:
-
Single Line Text – short written response (not scorable)
-
Paragraph – longer written response (not scorable)
-
Multiple Choice – one selection from a list (scorable)
-
Multiple Select – multiple selections from a list (scorable)
-
Numeric – number input (scorable)
-
Date – date input (not scorable)
-
Date and Time – date and time input (not scorable)
5. For Multiple Choice or Multiple Select questions, choose a Standard Response Set or create a custom response set.
6. If you choose to create your own responses, click New and fill in the response field and the score value for each response you would like to add.
7. For scorable questions, assign score values to each response.
8. Click Apply to save the question. Continue adding questions or create additional sections as needed.
Once you have set up the Sections and added all the Questions you can click Done to complete the Survey set up. You can come back and modify or even add to the Survey at another time. However, once the Survey is attached to a Survey Campaign you will not be able to delete Questions or Sections.